Showing posts with label NYC. Show all posts

Tuesday, March 29, 2011

Flatiron Detail

Another of my favorite buildings, the 1902 Flatiron Building (Fuller Building.)

Built to take advantage of the triangular lot formed by Fifth Avenue, Broadway, and East 22nd Street, H.G. Wells proclaimed when he first saw it:

"I found myself agape, admiring a sky-scraper the prow of the Flat-iron Building, to be particular, ploughing up through the traffic of Broadway and Fifth Avenue in the afternoon light."

Please see a schedule of some of my photo tours of NYC for Washington Photo Safari here.

Friday, March 25, 2011

Chrysler Building Details

Chrysler Building Radiator Cap Gargoyle Racing Cars
The Chrysler Building at Lexington and 42nd St is the iconic Art Deco skyscraper, and my own favorite. This view shows off the stainless steel "gargoyles" at the 31st floor level. They're modeled after the radiator cap of the 1929 Chrysler. You can also see the mosaic cars that race all around the 31st floor.

The Chrysler Building is one of the many great photo-worthy sites we'll visit during my Photo Safari to NYC next Saturday, April 2, 2011. Photo instruction, including composition and how to get the most out of your camera is all included!

Register here

Wednesday, March 16, 2011

NYC Artist Makes It Big

Talk about making it big!

I was walking to the Lexington Avenue subway station on E. 23rd Street when I looked up and saw this giant work-in-progress. There were actually four men working on this - two each on two platforms.

I had my Tamron "super-zoom" 18-270mm lens on my camera. I racked it to full-out telephoto and started to watch the painters. The 270mm position was just enough to show a small but detailed figure against a large section of the painting.

From a superb workshop I took with Karen Schulman, I knew that in an image like this, gesture is important to keep the photo from looking too static. "Gesture," in that context, could mean a lean of the body, an arm or leg extended, in other words, just about anything that departs from "just standing there."

For this situation, I figured that "gesture" would be in the form of reaching out with the paintbrush. It took about 20 minutes, but sure enough, I got a few shots of two of the guys in a good lean-and-stretch. This one is the one I liked best, as he's putting his whole body into it.

In case you're curious, the... er... I don't know what to call the painting-on-the-side-of-a-building... is for a remake of the 1981 film, Arthur.

Monday, March 14, 2011

Man With A Mission...

... as he walks by this blue wall in Manhattan's Flower District on W. 28th Street early Saturday morning.

Join me on my next Photo Safari to Midtown Manhattan on April 2, 2011 at 1PM.

Sunday, February 20, 2011

New Yorker Hotel

Opened in 1930, the New Yorker is a classic example of the Art Deco style, with its setbacks and bands of friezes.

Bad times in the Big Apple led to the hotel closing in 1972, but it was resurrected and renovated in the '90s, restoring a touch of class to the Garment District.

Friday, February 18, 2011

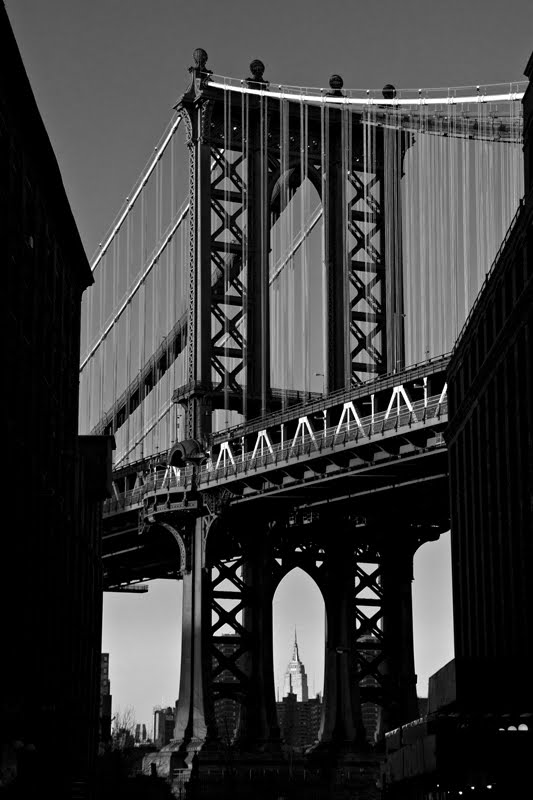
DUMBO

A view of the Manhattan Bridge from Washington Street in Brooklyn.

The up-and-coming neighborhood is now called "DUMBO", for Down Under Manhattan Bridge Overpass.

Brooklyn Tower

Here's the Brooklyn-side (eastern) tower of the Brooklyn Bridge. looking up through the spider web of cables and stays designed and built over 100 years ago.

Woman on Steps

This is part of the monumental facade of the main NYC post office, zip code 10001.

On the entablature resting atop the Corinthian colonnade is the famous inscription, "Neither snow nor rain nor heat nor gloom of night stays these couriers from the swift completion of their appointed rounds."

Friday, July 2, 2010

Whenever I visit NYC, I can't be within 10 blocks of Grand Central without walking inside and then heading out the front entrance to admire the facade.

In this case, I was heading back uptown from visiting old friends in the East 30's. Shot at 11pm just after it stopped raining.

Sunday, June 27, 2010

Father & Son on the High Line

The High Line is Manhattan's newest park, built on a section of the former elevated freight railroad along the lower west side of Manhattan.

When I was there in mid-April, I saw lots of families out for a Sunday stroll. The design of the park is very innovative, including what looked to me like oversize chaise lounges on flanged wheels set on areas of renovated track.

There are great views of New Jersey, just across the Hudson River, as well as the many buildings that border the High Line.

As of now, the High Line runs through the old Meatpacking District, from Gansevoort Street to about 23rd Street. Eventually, it will continue through Chelsea and terminate at West Side Yard in the lower 30's.

Saturday, June 26, 2010

Central Park Lamppost

You can find these lampposts throughout Central Park. Not only are they attractive, they can help you figure out approximately where you are. Look for a small metal tag near the base with four numbers, for example "7624". The first two numbers signify the street (in this case 76th) that is directly outside the park to the east or west of your position. The second two numbers seem to be arbitrary, but are unique to each lamppost along that east-west axis.

If you ever find yourself in an emergency in the park, you can call the police and give them the 4-digit number of the nearest lamppost; they'll know within a few dozen feet where you are.

The blossoms just beyond the lamppost in this photo are cherry trees in full bloom in mid-April. I used Channel Mixer in Photoshop CS3 with the red filter preset to convert the image to black-and-white and bring out the blossoms.

Wednesday, May 12, 2010

Art Deco Heaven

In the foreground is the 1936 statue of Atlas by Lee Lawrie and Rene Chambellan. The Art Deco statue greets visitors to 630 Rockefeller Center (the International Building) as well as passers-by. Through the spherical astrolabe on Atlas' shoulders, you can see 30 Rockefeller Center.

"30 Rock", since 1988, is called the GE Building. Before that, it was the RCA Building. The renaming took place after GE bought RCA (and thus, NBC) 27 years ago.

Prior to 1988, "the GE Building" was the beautiful 1931 Art Deco skyscraper at 570 Lexington Avenue. Oddly enough, the building was designed for RCA, and the original plans refer to it as "RCA Building." As it was being finished, GE and RCA were involved in some anti-trust actions, and in the settlement, GE got the building.

I was privileged to work in the "old" GE Building at 570 Lexington for 8 years. There was a company dining room on the 50th floor where anyone, from Jack Welch to the newest mail boy, could eat for a few bucks. The view to the West from the mens' room on the 50th was spectacular, until the Leona "Queen of Mean" Helmsley built her execrable Helmsley Palace Hotel.

Tuesday, May 4, 2010

The New Times Square

Several blocks in the Times Square area have been converted to pedestrian-only zones. The City even put out all these chairs (like the ones in Bryant Park over the last several years) as well as cafe tables.

Thursday, March 4, 2010

Juxtapostion

Reflection of the Chrysler Building, an Art Deco masterpiece, in the rectilinear glass curtain wall of the Grand Hyatt Hotel across Lexington Avenue.

Saturday, November 7, 2009

Ramble Arch

The Obligatory Group Photo of our gang from Shutterbug Excursions at our photo meetup in Central Park last weekend.

As I led them through the Ramble, I found Ramble Arch, the narrowest arch in the Park and a great favorite of mine. I knew I had to get a photo of the group in the archway.

Wednesday, October 1, 2008

Monday, September 15, 2008

Governors Island

Governors Island FerrySandy and I spent a great two days in New York City this weekend, seeing Mama Mia! on Broadway and doing some sightseeing.

I'll have many more photos and, of course, lots to gab about, when I have some more time later this week.

But meanwhile, if you're visiting New York on a Friday, Saturday, or Sunday between now and October 12th, be sure to consider a trip to Governors Island, a former military reservation just off the tip of lower Manhattan that's now a great venue for picknicking and sightseeing.

Tuesday, September 2, 2008

Tech Tuesday: Better B&W From Digital

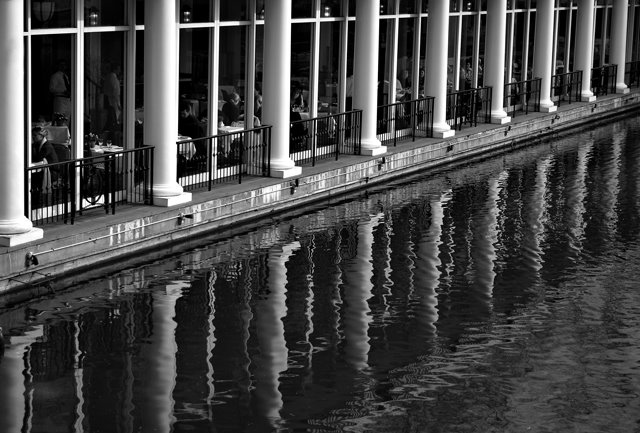
Loeb Boathouse - Just Removed the ColorOK, I'll let you in on a secret - much of what I've learned about Photoshop Elements is from Scott Kelby's excellent books - I think he's written one for each version so far - I'm a little behind the times right now, so I'm still using The Photoshop Elements 4 Book for Digital Photographers.

One of the things I know very little about is how to get a decent B&W image from a color digital photo... but yep, Scott goes into that, too.
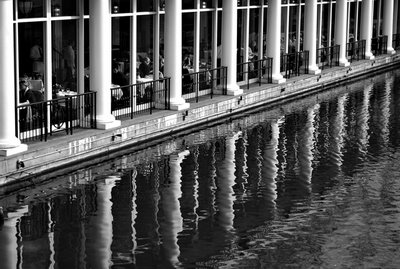
Loeb Boathouse - Better B&W using Scott Kelby's technique
Here's the general outline to how he says to do it:

  • Open the color image in Photoshop Elements.

  • Make sure the foreground color is Black and the background color is White (or as Scott says, just press the "D" key - this will set your foreground and background colors exactly this way.)

  • Go to the Layers palette and choose Levels from the Create Adjustment Layer drop-down menu (it's the half-black, half-white circle icon.) Once the Levels dialog comes up, just click OK.

  • Now again, from the Layers palette, chose Gradient Map from the drop-down menu and just click OK on the Gradient Map dialog. This will give you a B&W image, and you should notice that it already looks better than just using the standard commands to create a grayscale image (Image/Mode/Grayscale, or Enhance/Adjust Color/Remove Color.)

  • Here's where you can tweak the B&W tones a bit. First, in the Layers palette, double-click right on the Levels thumbnail to bring up the Levels dialog. Select Red from the Channel drop-down list, and then play a bit with the black-point slider to the right to increase shadows until you see what you like.

  • Without clicking OK, select Green from the Channel drop-down list, and this time try dragging the white point slider to the left to increase highlights.

  • Again, don't click OK yet - now pick Blue from the Channel drop-down list and try playing with the highlights (quite a bit) and the shadows (just a little.)

  • You can go back and forth between the 3 channels, tweaking away - just stop when you're happy with the look, then finally click OK in the Levels dialog.

At this point, mush the layers you created into one layer with the Layers/Flatten menu. The file still has color information in it - if you want to save file space, you can turn it into a grayscale file with Image/Mode/Grayscale.

For this photo, once I got to this point, I applied local contrast sharpening as I usually do (see this post for how to do that) and then final sharpening. You can see the results in the second image - compare that one to the standard remove-the-color version at top. To paraphrase those laundry soap commercials - whiter whites, blacker blacks, and just nicer overall tonality.

Amazingly, I even got an excellent B&W print of this second image on my 3-1/2-year-old Canon i850 printer. I would have expected some tinting, at least in some areas of the photo, but this print looks like an old-fashioned paper-and-developer B&W print (I doubt that this will work out so well for every image - normally you need an inkjet printer that's designed to do B&W, such as some of the higher-end Epsons.)

If you use Photoshop or Photoshop Elements, check out Scott Kelby's books - he packs them with excellent practical how-to advice.