 In a previous Tech Tuesday post, I showed you how to add a lot of snap to your photos by color-correcting them using the darkest black and whitest white points in your image.
But what happens when you just can't find something that should be a good black or a good white?
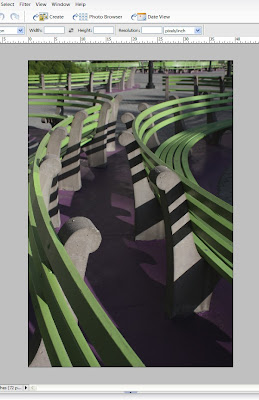
Here's an example of such a problem-child photo; it' hard to pick out either a black point or a white point in this image.
One of the problems is that the photo was a little underexposed, so you may not see a good patch of white anywhere - it may look like light gray.
But it turns out that most versions of Photoshop and Photoshop Elements will help you find those black and white points with just a little bit of work.
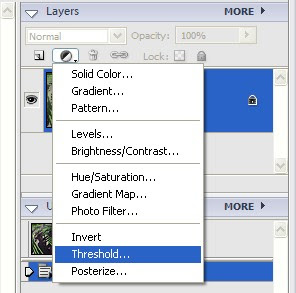
 You need to make sure your Layers palette is showing. If it isn't, click on the Windows menu item and choose Layers. Now click on the little divided circle near the top of the palette to drop down the menu, and select Threshold.
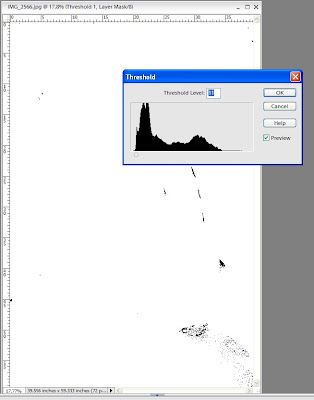
 Now you'll see that your photo shows up in very high-contrast black and white, with a Threshold dialog floating above it.
Drag the slider under the histogram all the way to the left, and your photo will go completely white.
Now very slowly, drag the slider back towards the right, and at some point, you'll see some areas of your image reappear as black, as you see in this photo. These areas are the darkest ones in your image. What you need to do is to note where they are - click the Preview checkbox off and on a few times so that you can fix in you mind just what part of the photo you want to set to black.

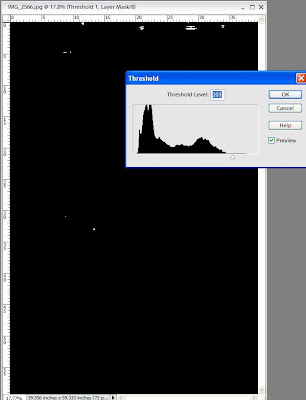
Now drag the slider all the way to the right, and you'll see the whole photo go black. As before, drag the slider very slowly, but this time to the left, and you'll begin to see some parts of your image appear in white. These are the lightest parts of your photo. Again, use the Preview checkbox to fix in your mind just which part of the photo you want to use as the brightest.
 Now that you know the blackest and whitest points in your image, click Cancel on the Threshold dialog, and use press CTL-L to bring up the Levels dialog.
Use the black point and white point eyedroppers to select the darkest and lightest parts of your photo, as you learned a few weeks ago.
What about setting the gray point? Well, in this photo, there was plenty of neutral gray in the cobblestoned surface of the plaza, but that isn't always the case.
Next Tuesday, I'll show you a technique for finding neutral gray.
By the way, all of these cool photoshop techniques - I can't claim credit for them. I learned them by reading books and articles by Scott Kelby. What Scott doesn't know about Photoshop probably isn't worth knowing, and on top of all that, he's a wonderful writer.
No comments:
Post a Comment