Sunday, September 7, 2008

Doo, Doo, Doo Lookin' Out My Front Door!

I opened my front door one night and there she was, already having spun a pictorially perfect composition - must have known a photographer lived there.

I just used flash to illuminate spider and web, while leaving the nighttime front yard dark.

In Photoshop, I applied a reverse B&W gradient map (the small gray areas are tree leaves that barely left any shadow detail in the original.)

That's it - no cropping even!

Saturday, September 6, 2008

Foggy Morning Gamble

Foggy Serenity Woke up, jumped out of bed... and noticed that it was a very foggy morning. The first thing that went through my mind is, "Be careful driving to work!"

But the next thing was, "How about some foggy morning photos?"

Mystery, solitude, serenity... those were the thoughts running through my mind as I envisioned what kind of photos I thought I would take.

So what next? Take foggy photos in my driveway? OK, what's the shooting location?

As I got ready to leave, I decided to go to a spot that I had photographed before - a small community marina on the Severn River . I would be driving within a half-mile of it on the way to work anyway.Upper Severn Pier

Once I got there and started shooting, I became aware that I didn't know the first thing about shooting in the fog. It was amazing to realize that I had never done it before, or if I did, I have no memory of it.

Once again, here's where digital camera really helps me. I could see from the images on the little LCD display that I was getting something like what I had envisioned. Back home this evening, a little mucking around with Levels in Photoshop helped spread out the very limited brightness range of the scene so that I could get decent prints.

>All in all, I think the foggy morning gamble worked - I do see a little mystery, solitude, and serenity in these images.

Friday, September 5, 2008

Gesture

I admit it. I'm just not all that good when it comes to photographing people. Lines, shapes, patterns, colors ... boats, buildings, windows, tableuax - that's my thing - I can take my time and compose to my heart's content. Nothing is moving too fast - or at all.

But people are a lot more dynamic than that, and I find it hard to keep up and catch that decisive moment that divides an interesting people-photo from a not-so-interesting one.

Something I've mentioned several times before in this blog is the wonderful photo workshop I took with Karen Gordon Schulman five years ago. Karen taught us about the special qualities of early morning and late afternoon/early evening light, something I've used again and again in my photos since then.

One thing I remember learning about shooting people from Karen is to look for gesture in the image. A body position, a lean, a pointing with the hand.

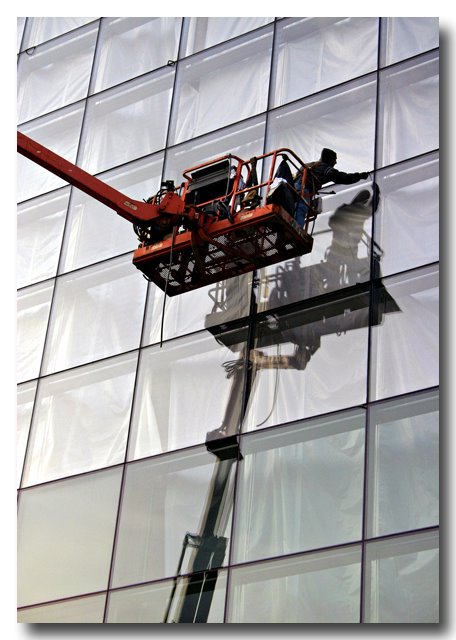
Well, walking to work one day along the Inner Harbor waterfront, I came upon a scene that I thought would make for a nice image. There was a device with the politically-incorrect name telescoping-boom man-lift. The machine was adjacent to a big glass wall of the National Aquarium, and there was indeed a man, lifted well into the air on the platform at the end of the boom. He was caulking the large window panes making up the wall.

I liked the abstarct feel of the scene, with the big panes forming a Cartesian background for the chevron-like design element of the man-lift boom and it's reflection. The little bit of color in the man-lift and the man himself added a nice touch, I thought. As I watched, I saw the man lean well to the right while reaching out to caulk a window joint...and there was my gesture.

I composed my shot and waited for him to do it again, which he obligingly did.


National Aquarium, Baltimore Posted by Picasa

I don't think this photo is one that will ever sell, but I find it very, very satisfying.

So Karen, thanks again! You've been a great teacher, and what I learned from you keeps coming back to me.

Thursday, September 4, 2008

Most of My Pictures Suck...

Ok, now it's safe for me to admit it. That's because Mike Johnston, the estimable photographer and photography writer, revealed the following a few years back:

To be honest, most of my pictures suck. The saving grace of that admission is that most of your pictures suck, too. How could I possibly know such a thing? Because most of everybody's pictures suck, that's how. I've seen Cartier-Bresson's contact sheets, and most of his pictures sucked. One of my teachers said that it was an epiphany for him when he took a class from Garry Winogrand and learned that most of Winogrand's exposures sucked. It's the way it is.
See the entire article, entitled The Magic Bullet, here.

Once I reconciled myself to the fact that most of my pictures suck, and that no matter what I do or what kind of fancy equipment I might use, most of my pictures will still suck, it was rather liberating.

When I'm out for a few hours of shooting, I'm completely happy if I end up with just a few, or even one, good image. In fact, if I end up with no decent photos at all, it doesn't bother me much anymore.

That's because just the act of getting out and doing photography is useful in itself in that I always learn something, even if what I learn is what doesn't work in making a good picture.

So come on now, say it with me, say it loud and say it proud: "My photos suck!"

Or at least 98 percent of them do. Now let's go out see if we can't get that two percent.

Wednesday, September 3, 2008

How I Got Started in Photography...

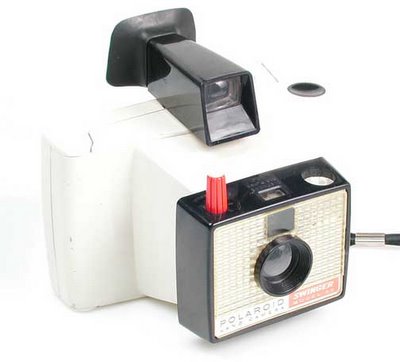
Polaroid Swinger
I was reading Dave Beckerman's blog (aka, The Mother of All Photo Blogs) the other day when I noticed the Photography Articles menu item. One of Dave's articles was called Confessions of a Recovering Camera Addict, sort of his camera history, and it struck a familiar chord with me.

So I thought, why not give my own history of camera addiction?

At age 17, it was a swinger that got me started.

Well, to be precise, it was a Swinger - a gray plastic Polaroid Swinger.

The camera was a very thoughtful high school graduation gift from my father's Cousin Ellen and her husband, the late Harold Siegel. I even remember the date - June 12, 1967 - the sixth day of the Six Day War - my parents had invited some family and friends to dinner in honor of my graduation.

Our genuine fear of a week earlier that something terrible was about to happen to Israel had been replaced by the elation of a complete victory for the Jewish State, and that added to the happiness of the evening.

I hadn't expected this wonderful gift, but I was genuinely delighted with the Swinger. The next day, I loaded up with the roll of film the Siegels had included and became a photographer.

The Swinger took a smaller version of what was then the regular roll film pack for Polaroid cameras. When you looked through the finder, part of what you would see was an indicator that said either "No" or "Yes." If you turned the red collar around the tall white shutter button, assuming that there was enough light for a successful photo, the "No" would eventually morph into "Yes," which meant that you had adjusted the exposure properly.

I realize now that it was what's called an extinction photometer - but a pretty effective exposure assistant nonetheless.

Swinger came with a manual, but you really didn't need it - Polaroid had a jingle-equipped commercial that told you all you need to know about how to use the camera - and the aggressive advertising campaign caused that commercial to also permanently embedded the price in my brain... "it's only nineteen dollars and ninety-five!" Hey, $19.95 was nothing to sneeze at to a 17-year-old in 1967.

The great thing about that little Swinger is that it whet my appetite for being able to do more with photography. I asked my friend Roger, who I knew was an avid amateur photographer - he had a Pentax H1a single-lens reflex, which at the time, seemed to me a magical mystery marvel of technology.

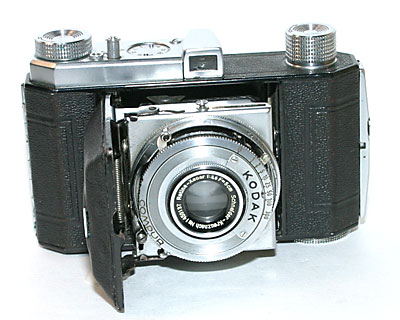
Roger showed me all about shutter speeds, f-stops, and focusing, at which point I dug out of a dusty bureau drawer my Dad's "real" camera, a Kodak Retina 1 (Type 010). Sure enough, there were the shutter speeds, there was the f-stop control, and here was a scale, in meters, for focusing. And by scale, I mean just that - this model of the Retina was a "scale-focuser", which means no rangefinder or other focusing aid - you have to use your calibrated eyeballs. But it had a pretty decent Schneider-Kreuznach 50mm f/3.5 lens, and not having a rangefinder also forced me to learn about hypefocal distance and use of the camera's depth-of-field scale. With Roger's tutelage, I soon was taking "real" photos with this "real" camera. Roger even gave me an old GE DW-48 light meter, and so I was in business.Retina 1 Schneider-Kreuznach Xenar

Roger and his dad had built a nice darkroom in their basement, and during that summer, they often invited me over to use it. The first time I saw one of my photos starting to "come up" in the developer tray under the safelight, I was hooked.

That fall, I started college at Stevens Institute of Technology in Hoboken, NJ. I joined the camera club, hung out with other photo enthusiasts, and made good use of the well-equipped darkroom that was available to us. Being a 35-cent, 15-minute ride from Manhattan didn't hurt either, as I was presented with plenty of subject matter.
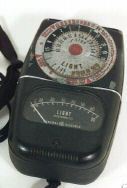
GE DW-48 Light MeterDuring the school year, I became good friends with my classmate Rich Schnabolk, who was a more advanced photographer than me. Rich actually had an SLR, albeit a Kowa SE, which I used to rib him about. Nevertheless, I wasn't too proud to use the Kowa and Rich was a good enough sport to lend it to me from time to time. And from humble beginnings... that Kowa made me lust after a "real" camera, that is, an SLR.

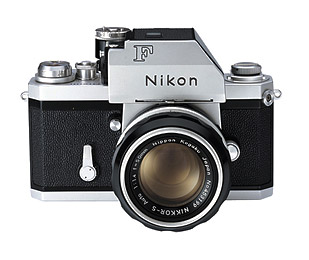
During the summer of 1968, I worked at a photo store nearby. The owner had just bought a new Nikon F Photomic Tn, and offered me his 3-year-old Nikon F Photomic T at a very cheap price. And suddenly, I was a big-time Nikon photographer!
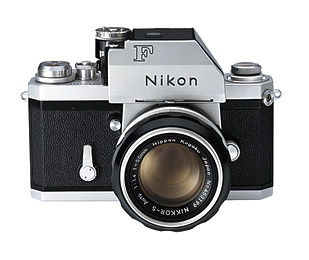
Nikon F, Photomic T FinderBack at college, I was a yearbook photographer, then photography editor in my junior year. We had bought a Yashica Mat 124 TLR that year, and digging around I found an old Crown Graphic 4x5 press camera that hadn't been used in years. I took both of them home with me during the summer, and I made good use of the TLR as a dog photographer (or, as Mom used to call me, Photographer to the Dogs.

More history when I get around to it....

Tuesday, September 2, 2008

Tech Tuesday: Better B&W From Digital

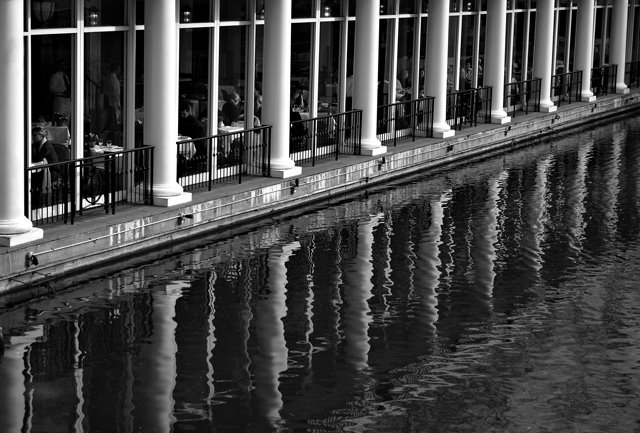
Loeb Boathouse - Just Removed the ColorOK, I'll let you in on a secret - much of what I've learned about Photoshop Elements is from Scott Kelby's excellent books - I think he's written one for each version so far - I'm a little behind the times right now, so I'm still using The Photoshop Elements 4 Book for Digital Photographers.

One of the things I know very little about is how to get a decent B&W image from a color digital photo... but yep, Scott goes into that, too.

Loeb Boathouse - Better B&W using Scott Kelby's technique
Here's the general outline to how he says to do it:

  • Open the color image in Photoshop Elements.

  • Make sure the foreground color is Black and the background color is White (or as Scott says, just press the "D" key - this will set your foreground and background colors exactly this way.)

  • Go to the Layers palette and choose Levels from the Create Adjustment Layer drop-down menu (it's the half-black, half-white circle icon.) Once the Levels dialog comes up, just click OK.

  • Now again, from the Layers palette, chose Gradient Map from the drop-down menu and just click OK on the Gradient Map dialog. This will give you a B&W image, and you should notice that it already looks better than just using the standard commands to create a grayscale image (Image/Mode/Grayscale, or Enhance/Adjust Color/Remove Color.)

  • Here's where you can tweak the B&W tones a bit. First, in the Layers palette, double-click right on the Levels thumbnail to bring up the Levels dialog. Select Red from the Channel drop-down list, and then play a bit with the black-point slider to the right to increase shadows until you see what you like.

  • Without clicking OK, select Green from the Channel drop-down list, and this time try dragging the white point slider to the left to increase highlights.

  • Again, don't click OK yet - now pick Blue from the Channel drop-down list and try playing with the highlights (quite a bit) and the shadows (just a little.)

  • You can go back and forth between the 3 channels, tweaking away - just stop when you're happy with the look, then finally click OK in the Levels dialog.

At this point, mush the layers you created into one layer with the Layers/Flatten menu. The file still has color information in it - if you want to save file space, you can turn it into a grayscale file with Image/Mode/Grayscale.

For this photo, once I got to this point, I applied local contrast sharpening as I usually do (see this post for how to do that) and then final sharpening. You can see the results in the second image - compare that one to the standard remove-the-color version at top. To paraphrase those laundry soap commercials - whiter whites, blacker blacks, and just nicer overall tonality.

Amazingly, I even got an excellent B&W print of this second image on my 3-1/2-year-old Canon i850 printer. I would have expected some tinting, at least in some areas of the photo, but this print looks like an old-fashioned paper-and-developer B&W print (I doubt that this will work out so well for every image - normally you need an inkjet printer that's designed to do B&W, such as some of the higher-end Epsons.)

If you use Photoshop or Photoshop Elements, check out Scott Kelby's books - he packs them with excellent practical how-to advice.

Monday, September 1, 2008

Sunless Sunrise Meetup

Happy Labor Day!

Shutterbug Excursion Meetup in AnnapolisThis past Saturday, I had organized an early-morning event for our photo Meetup group, Shutterbug Excursions, for 6am in Annapolis. It was a last-minute thing whose theme was "Greet the Sunrise," and at best, I expected three or four other die-hards to show up.

Instead, we had twelve enthusiastic Excursionaires - our largest Meetup to date. In the photo above by George Skeption, you can see (left to right) George, Carol, Dan, Quilly, Josh, Your Intrepid Correspondent, Tracey, Elsa, and Gary.

Got To Go!


Perfect Coil - Annapolis MDThe main idea of this Meetup was to experience the magical morning light as we walked around sailboat country, but as luck would hav it, this turned out to be a sunless morning. This didn't faze the Excursionaires one bit; you can see some of their photos from the event here.

By 8:30am we were in Eastport, tired and hungry, so I led the gang back across the Spa Creek bridge and up Main Street to Chick & Ruth's Delly for breakfast.

Chick & Ruth's is an Annapolis institution. As usual, it was packed on a Saturday morning with locals and visitors, including a group of Naval Academy graduates from the class of 1968 (I didn't see Senator Webb, unfortunately.) Owner Ted Levitt nevertheless quickly found us seats close together, and we enjoyed a good breakfast with lots of fun schmoozing.

To cap off the morning, we got to participate in a Chick & Ruth's tradition: at 9:30, everyone in the restaurant stopped, stood up, faced the large flag in the middle of the place, and recited the Pledge of Allegiance.